
Create PHP Courses Inside PhpStorm With EduTools

At some point in your professional career, you may want to share your programming knowledge with your co-workers or students. You may even want to start your own blog, YouTube channel, or account on social media to share your experience with a larger audience. If any of this is something you are interested in, we have good news for you. Now you can create your own educational courses inside PhpStorm! This functionality became available with the release of the EduTools plugin v2022.2, which is free and can be installed in PhpStorm in just a few clicks.
What is EduTools?
EduTools is a free plugin that can be installed directly in JetBrains IDEs, including PhpStorm. As one of JetBrains Educational Products, the plugin aims to empower users around the world to learn and teach a variety of programming languages, such as PHP, Java, Kotlin, Python, Scala, JavaScript, Rust, C++, and Go. More than 700,000 users have already used EduTools to learn or teach programming!
As a course creator, you can leverage the EduTools’ rich educational functionality to motivate your students to learn programming, facilitate their learning process, and help them enjoy programming. Let’s take a look at a few things you can do using EduTools as a course creator:
💡 Create interactive courses and fill them with theory and exercises.
☑️ Test learners’ knowledge with different tasks such as multiple choice questions or coding exercises validated by output.
⚙️ Add custom placeholders, such as “type here”, and create a dependency between them so learners won’t have to go over the same answers twice.
🗨️ Write tests that automatically check tasks and provide immediate feedback with helpful error messages.
🖇️ Add hints with more information or relevant links to help learners find the right solution.
🔁 Share your course publicly or privately with others.
Your courses will provide learners with a hands-on, interactive way of learning while they gain experience with professional development tools. In addition, because all courses are taught right in JetBrains IDEs, smart coding assistance features such as code analysis, on-the-fly error highlighting, and code completion make it easier for learners to understand how to work with their code.
How can I create a course?
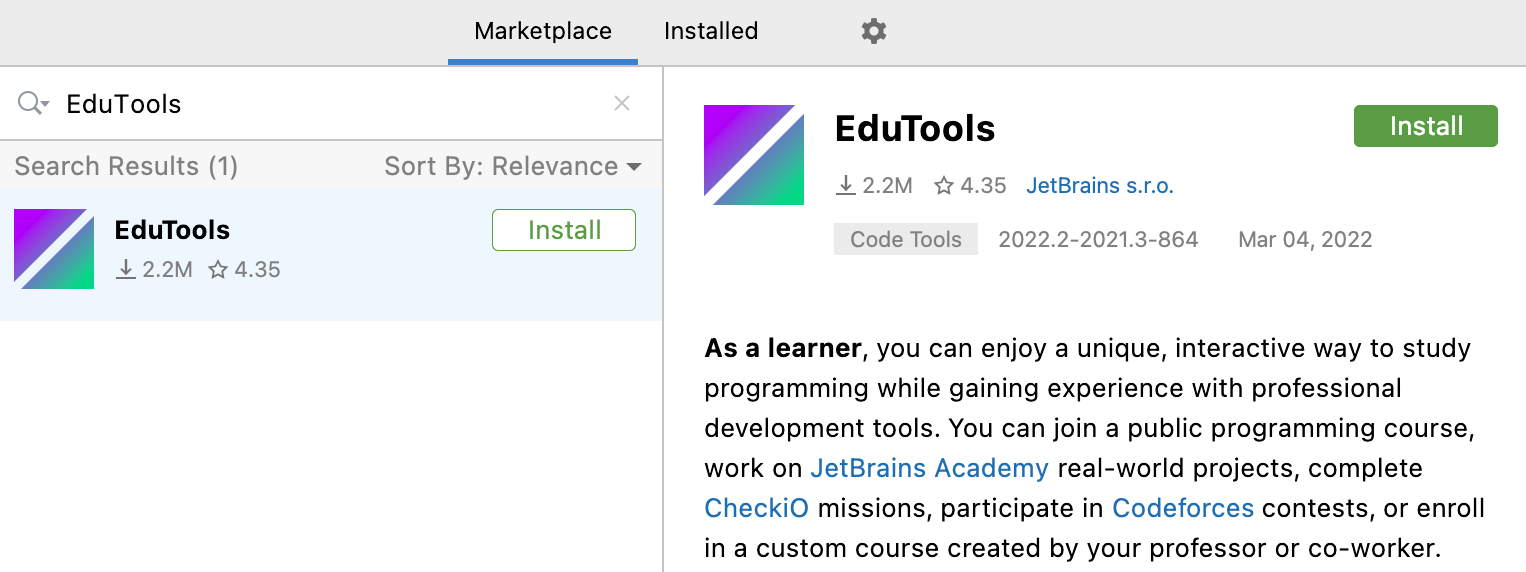
To get started, install the EduTools plugin for PhpStorm. Make sure to install the latest version of EduTools.
- In the Settings/Preferences dialog (⌘ ,), go to Plugins.
- In the Plugins dialog, switch to the Marketplace tab.
- In the dialog that opens, search for EduTools and click Install.
Create a course
To create your own educational course, go to the My Courses tab on the Welcome Screen, click the three-dots button (⋮) and select Create course…. Alternatively, you can go to File | Learn and Teach | Create New Course, and fill in the title, author, and description details.

Add lessons to your course
Every course created with your IDE is structured as a list of lessons. There are two lesson types: lessons and framework lessons. See our Framework Lessons Guide for Educators to learn more about framework lessons that allow you to work continuously with the code through multiple tasks.
To add a new lesson, highlight your project and select File Menu | New | Lesson. To look at the course structure, go to View | Tool Windows | Project.
Fill your lesson with tasks
Each lesson contains tasks. There are five task types:
- Edu – a coding exercise validated by tests.
- Output – a coding exercise validated by output.
- Theory – theoretical learning material without validation.
- Multiple-choice – single or multiple choice quiz.
- IDE – a task that helps you learn IDE functionality.
Let’s take a closer look at the Edu task, since that’s the most common task type in our courses. For more information about other types of tasks, read our Educator Start Guide.
Create a task
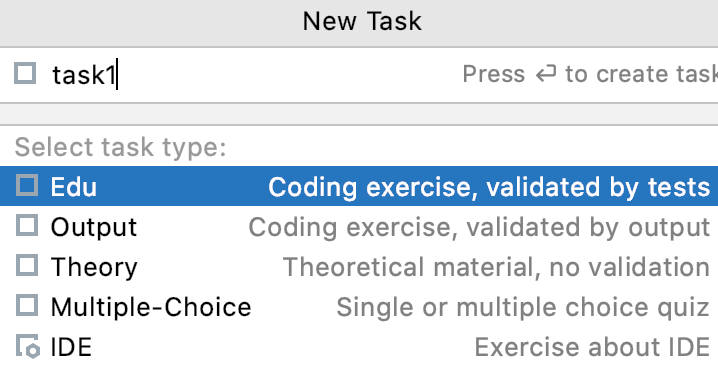
The Edu task design is quite simple: there are task files that need to be modified and test files that validate the written code. To create a new Edu task, go to File | New | Task (or right-click your lesson, choose New | Task), and select Edu in the list:
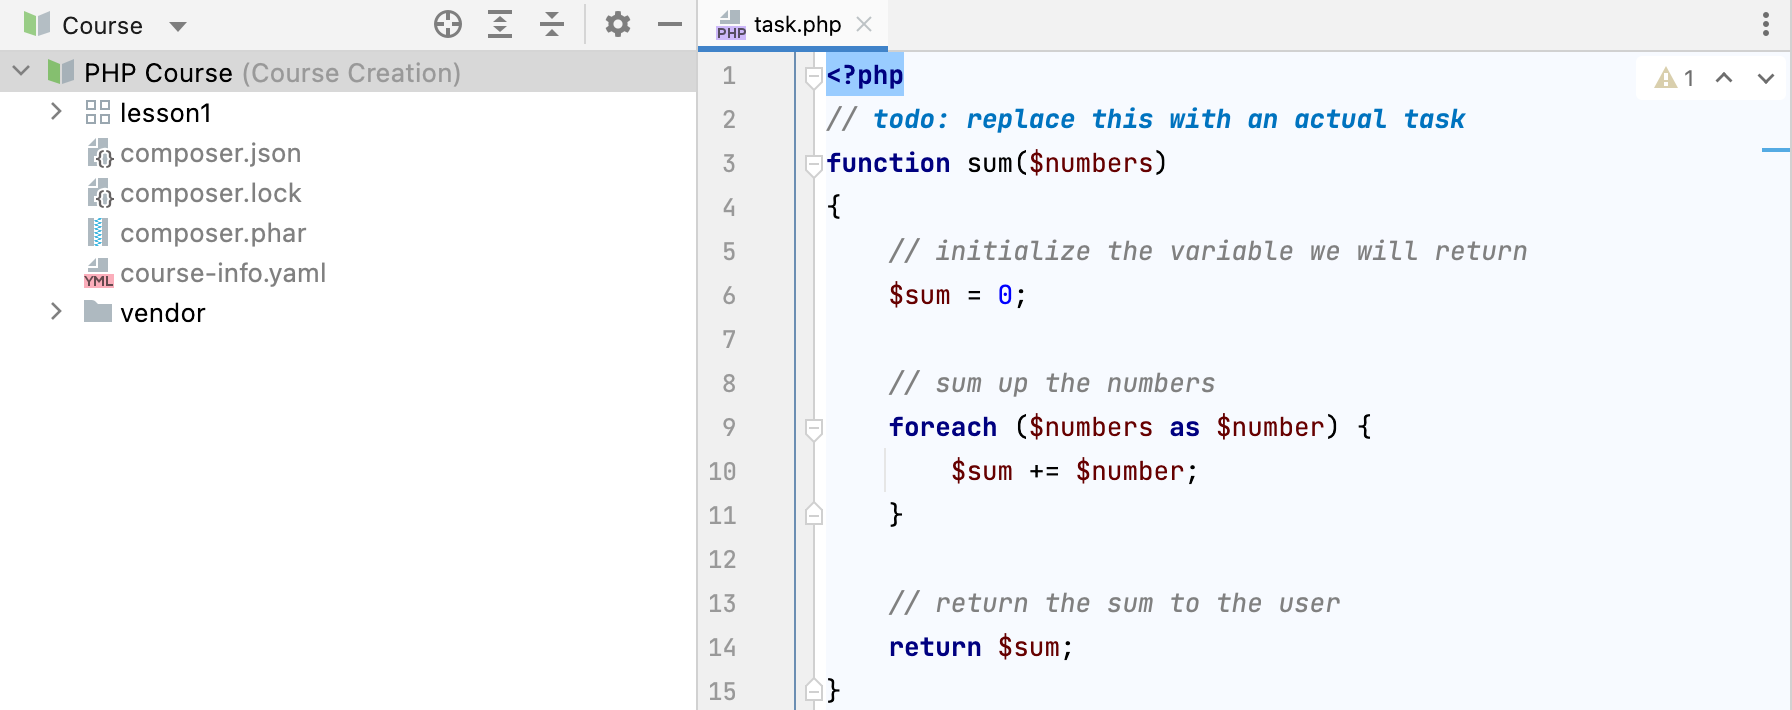
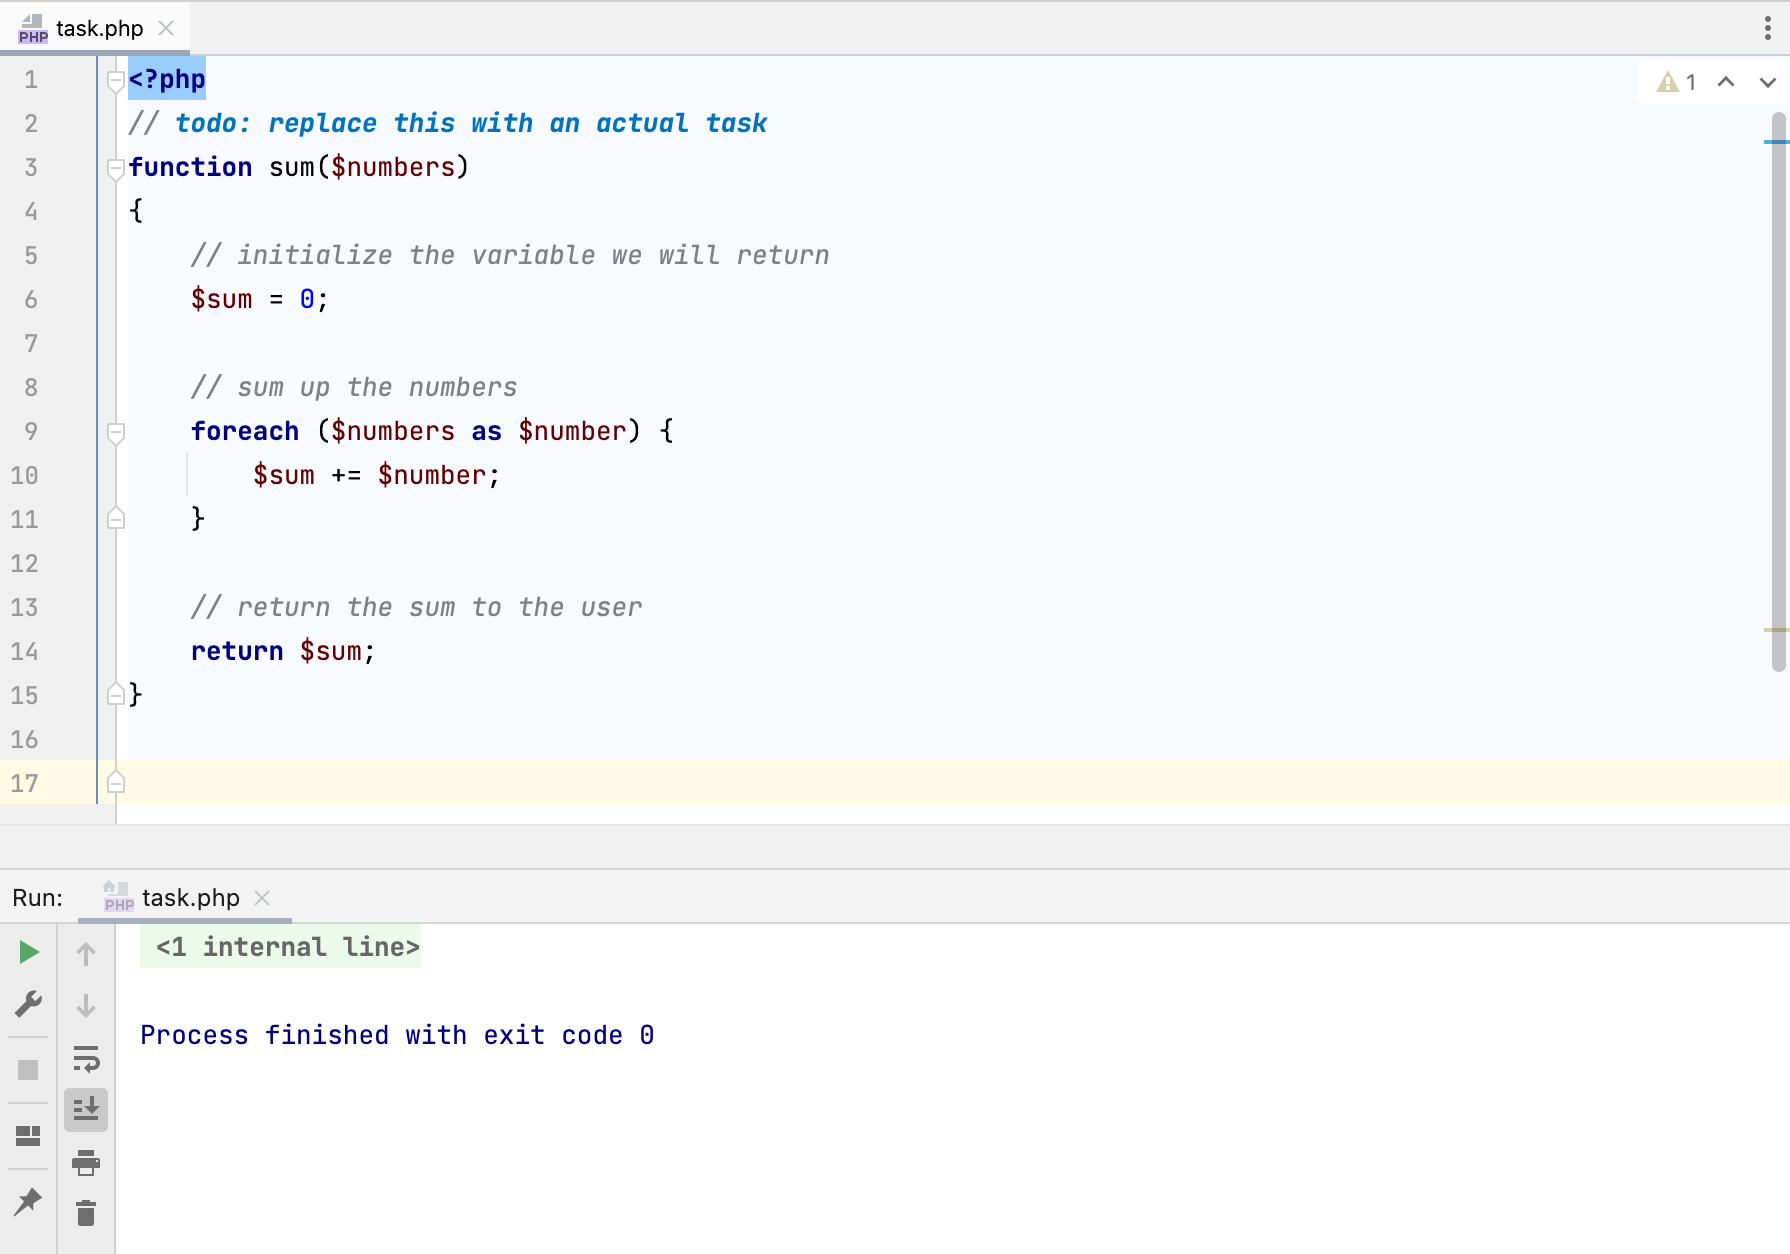
Open the Task.php file to write the code you want for the exercise, for example:
<?php
    function sum($numbers)
    {

    $sum = 0;

    foreach ($numbers as $number) {
    $sum += $number;
    }

    return $sum;
    }
Choose the Run option from the context menu or press ⇧+F10 (⌃R on Mac) to run your code and check if it works as expected:
Add a task description
Now it’s time to add the task description. Click the Edit icon at the top of the Task Description panel, or just open the task.html file. There, you can add images, helpful hints, or in-course links to refer your learners to a particular lesson, task, or file. You can even instruct the plugin to display a separate set of screenshots when using the dark IDE theme!

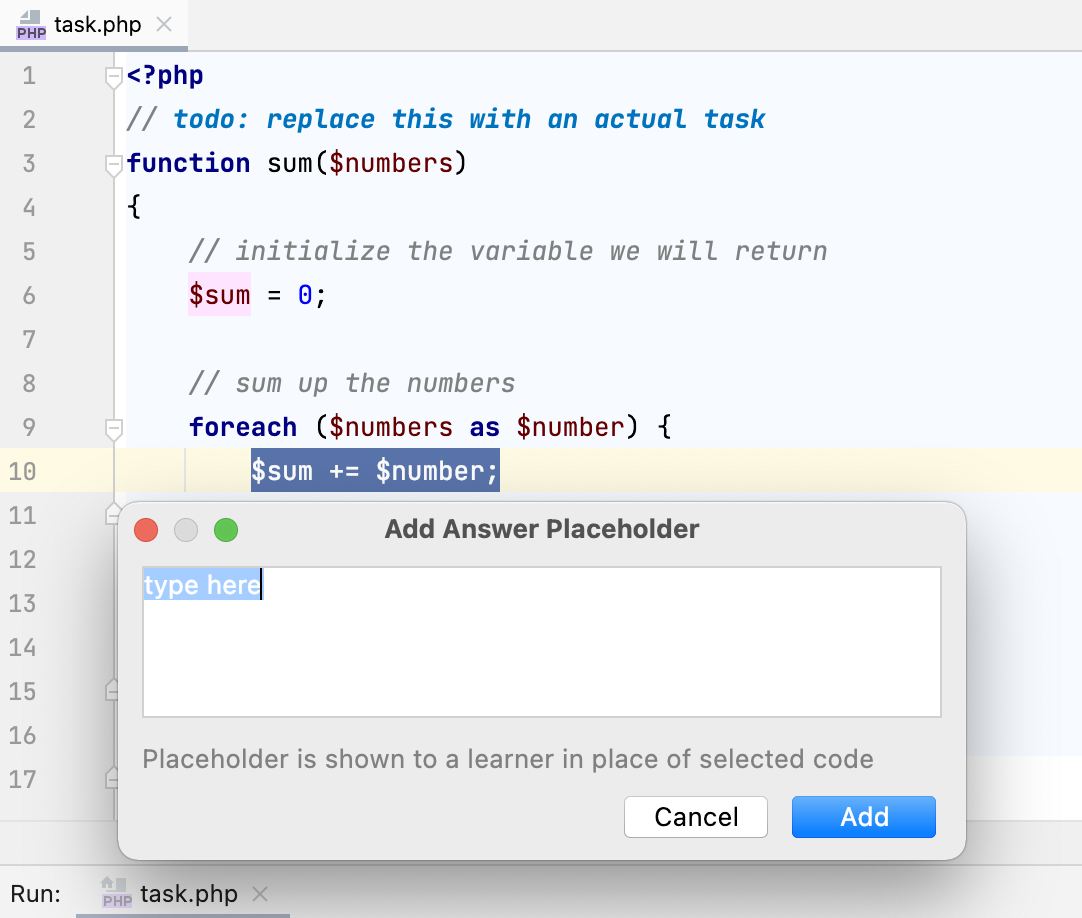
Add placeholders
To make your course more interactive, you may want to add custom answer placeholders to your tasks and set up dependencies between your tasks. Select a fragment of the code you want a learner to fill in, invoke the Add Answer Placeholder command from the context menu, and add the placeholder text:
If you add a placeholder to the next task, you can create a dependency between these two placeholders. To learn more about this functionality, check out the Framework Lessons Guide for Educators.
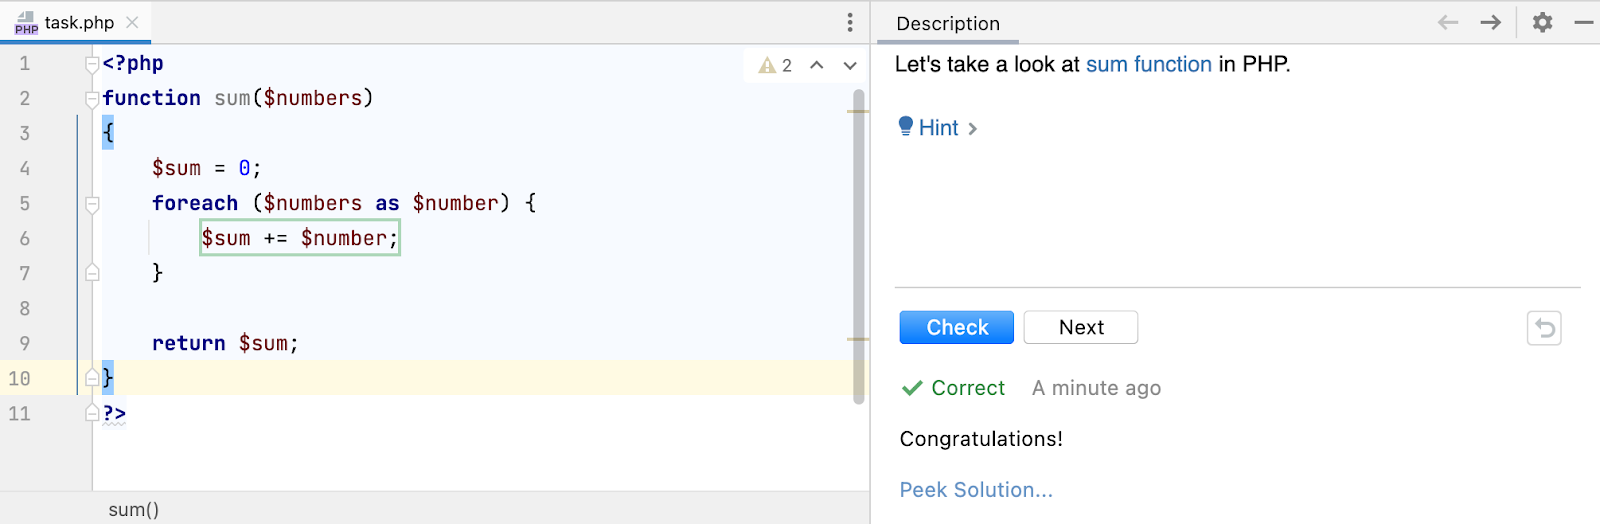
Write tests
You can write your custom tests to automatically verify the learner’s solution and provide immediate feedback. Every task has a test.php file in the test/tests directory that you will need to modify. To check that your code passes your own tests, click the Check button at the bottom of the Task Description panel. If your code and test are correct, you will see the Correct message:
Preview your course
When you have finished creating your course, it’s a good idea to view your course from a learner’s perspective and test it. Right-click the course view and go to Course Creator | Create Course Preview to open your course in learner mode:

In this mode, you can verify the course structure, use the Check button to check your solutions, verify the wrong-answer feedback, check that your hints and links are available in the task description, and verify the right-answer feedback.
Share your course with others
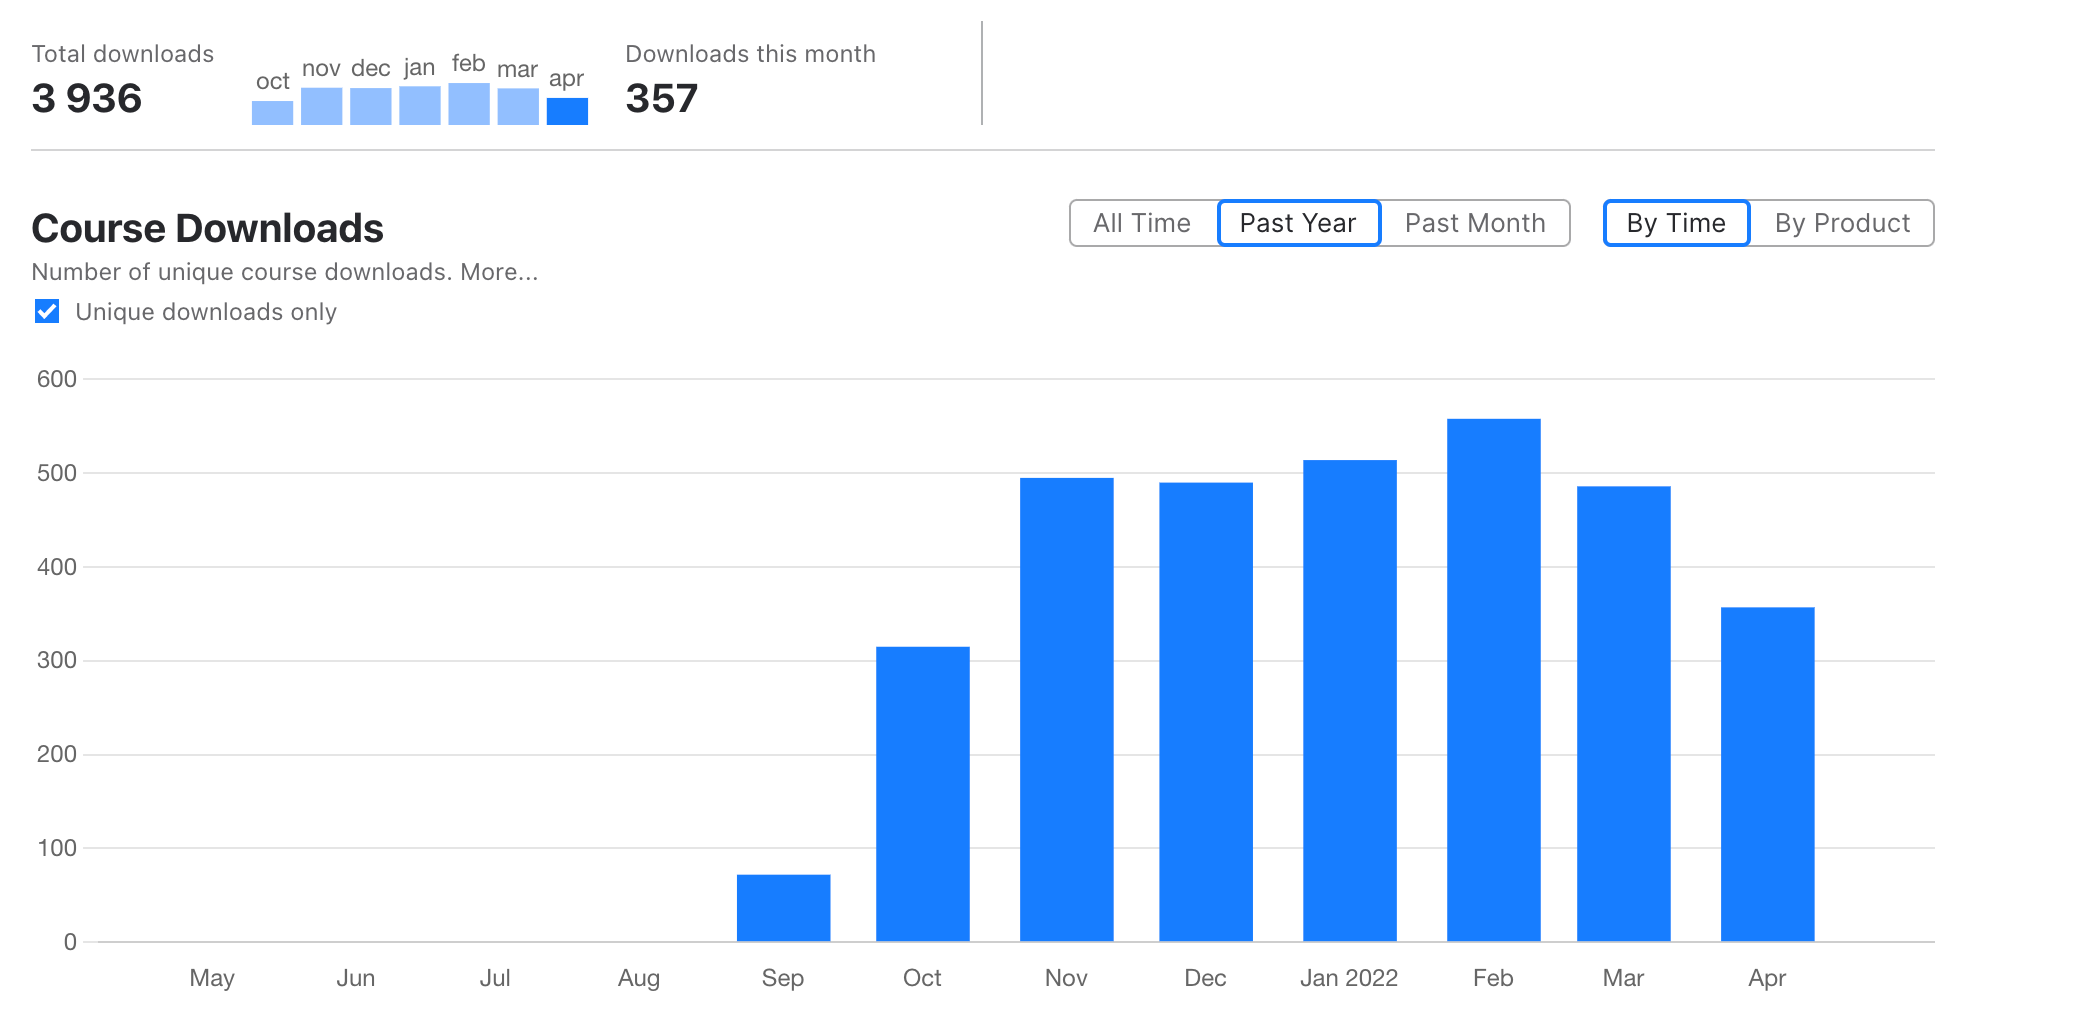
There are a couple of options available to you for sharing your course. You can upload it to JetBrains Marketplace – a plugin and course repository, push it to GitHub, or distribute it privately by exporting it to an archive. Once your course is on the Marketplace, you will be able to view detailed statistics for your course, manage information about the course, and check its ratings and reviews.
To learn more about our sharing options and other EduTools functionality, see our Educator Start Guide. If you’re interested in selling your courses, or if you have any questions or ideas you want to share, we would be very happy to discuss these with you – email us at education@jetbrains.com.
Now you’re all caught up regarding the main functionality of EduTools from a course creator’s perspective. We continuously add new features and release major enhancements to the plugin to enrich your experience when creating courses. However, if you notice something is missing, we’ll be happy to implement it in future releases! Leave us a comment here, share your post on Twitter, or create an issue in our issue tracker.
The Educational Products team
Subscribe to JetBrains Academy updates


